Pages

Showing posts with label Makeup. Show all posts

Monday, 7 July 2014

Makeup Haul | Mac, Benefit & Too Faced


Hello Lovely People,
As you can see, I went makeup shopping and kind of went a little mad, so I thought I'd share some of the amazing products I bought with you, first with an overview of everything and then in the upcoming days I'll review them individually. The Products I purchased are from Mac, Benefit, and Too Faced, all from Debenhams in Cabot Circus in Bristol. Mac is my typical goto Makeup store, Benefit next and then Too Faced is a product i have never tried before, although, I have heard great things and had heart palpitations when I saw the little Too Faced Stool, as I thought you could only get them online in the UK.

There were 3 items I knew I wanted to purchase from Too Faced that I had wanted for ages, The Sweetheart Perfect Flush Blush, The Brow Envy Kit and The Powder Pouf Brush (Which unfortunately I was unable to stretch my pay packet to :( ) The Blush, In colour "Something about Berry"just has the perfect blush colour pallet inside, with three really beautiful pink shades within. As for the Brow Envy Kit, I am a complete sucker for Brow Kits, I have so many it's shameful, and unneeded, However, this was an exception... another exception! ;) The kit is packed with everything you need, wax, powder, highlighter, 2 different brushes, tweezers, stencils and brow directions! Just amazing. 

As for Benefit, I use this brand a fair amount, I mean, what is there not to love, Flawless makeup, their funky retro design, colourful girly brand, and the cute slogans they put on their products that just make you smile! The first item I rushed to was the Gimme Brow - brow-volumizing Powder Gel. my eyebrows are almost non-existent when I apply my foundation, the colour seems to camouflage in with my makeup look, even though I'm a naturally dark haired brunette! So I usually apply a lot of eye brow makeup, and end up getting annoyed when it messes up when I'm in a rush! So this product, sticking my brow hairs in the perfect direction, giving them lift and a little colour is perfect for when I'm in a rush and want to wear minimal makeup. The Hoola Bronzer is just another product I have seen people going on about, so I thought I'd give it a try, a long with the They're real mascara. As for the Boi-ing Concealer, apparently, this is the Benefit Equivalent to the Mac Studio Finish Concealer, which is what I use, however, I felt it was time for a change to see if the Boi-ing could step up to the challenge of covering my freckles that come out in the sun, of which, actually, my Studio Finish hasn't been!

Then onto Mac, I got my usual, Mac Studio Fix Fluid, which I swear by like the rest of world :P I decided on purchasing another Mac 187 brush, which I use with my Studio Fix Fluid Foundation, as my other two have seen better days! And then I went a little Lipstick Crazy! I bought, the Retro Matte Relentlessly Red, The Matte Candy Yum-Yum and Amplified Creme Morange, They are all very loud and bright colours, of which, I love the names, The names describe and compliment the colour perfectly.

Hopefully in the next couple of days I will be reviewing some of the products and hope to love the ones I haven't tried as much as I think I will love them!

Have a great evening, Nighty night 
xox

Friday, 20 June 2014

Mac Pigment | 15 Ways To Use

Hello Lovely People!
So it wasn't until recently that I purchased and used MAC Pigment for the first time, (I know, crazy), And when I purchased Mac Pigment I was under the impression that it was simply an eyeshadow, but I couldn't have been more wrong! I discovered that there are in fact 15 ways to use it after a little but of experimenting and searching the Internet.

Mac Pigment is very simply, a coloured loose powder. Which most people use as an eyeshadow, However, many of you may not know the many other uses it has, which is almost anything by the way! That's why I wanted to do this blog post to tell you about the many other uses for Pigment so that you can make the most of yours!


1) Eye Shadow

Firstly, Is the very simple way which most people use MAC Pigment for, which is just using the loose powder, as is, as an eyeshadow. It comes in a very wide selection of colours, and finishes, including matte, frost metal and pearl, of which are matte, sparkle and sheen finishes meaning it is perfect for using as an eyeshadow and making some very beautiful eye looks. To use in this way you would simply dab your choice of brush into your chosen pigment, shake to remove any excess unneeded amount of Pigment, as you don't need very much, and then apply to the eye, Depending on what brush you choose to use you could apply the Pigment in a very feathered way or very concentrated way.

2) Applied Wet For Metallic Eye Shadow

Another way to use Pigment is, again, as an eyeshadow, but more as a cream based eyeshadow, similar to the Mac Paint Pot. To do this, I would mix in some of the pigment with simple water or if you have it available, Mac Fix & Spray. Then, simply grab your desired brush and apply to the eye. You will notice that the colour from the Pigment with really pop and stand out and in fact some finer colours that you may not quite see when in powder form, really come out when you apply in creamy form.

3) Blush

Using Pigment as blush is another great way you can use this product, Here you would use the product, as is, like in one, but using your desired blush or large puffy powder brush, and apply to the cheeks, depending on your preference, you could use any colour from the options, you never know, you could be quite wild and daring and want blue blusher! But Peachy, Pinks, Oranges, Reds, Corals, and Possibly Purple colours are the best options to create a realistic looking blush. As mentioned before, you could go for a very matt blush or could go for a satin finish blush with a slight sheen, depending on the finish you choose from the colour options. Depending on how strong you want you blush to be, you only need to use a tiny amount of the Pigment here, it is very highly concentrated and a little bit goes a really long way!

4) Bronzer
Very much like above, use the pigment, as is, in the darker colours that resemble bronzer colours, such as Tan and Naked Deep Dark, and apply to the areas you want to be bronzed!

5) Eye liner

Again, the same as you would do with step 1) Mix the pigment with water or Mac Fix & Spray. Once you have mixed you would use a thin eyeliner brush and simply apply whatever colour you wish as an eyeliner. You could use a black and go for a typical eyeliner or you could use golds and bright neon colours for some really great editorial look thats really stand out!

6) Coloured Mascara

There are two ways you can do this, I discovered online, you can dip an empty disposable Mascara Wand into your Mix of Pigment and Water or Mac Fix & Spray and apply to the lashes as normal, or you can simply use a clear Mascara, dip into the powder of your choice and apply to the lashes.

7) Highlighter

One of my favourite ways to use pigment is as a highlighter, You could do this in two different ways. The first way is very simple, you would simply use a brush or your finger and apply the Pigment, as is, to the desired area you want to highlight, light colours are recommended of course and you are trying to brighten these areas, However, there are many different choices, the most popular, and the colour that I purchased, is in colour Vanilla, although there are many other white, cream and in fact gold colours for the perfect highlight. Another way is like in many of the steps above, mix your pigment in with water or Fix & Spray by MAC or possible with any face creams you have, or possible with a cream based highlighter you are already using if you wish, and apply to the face as a cream based highlighter. When I used pigments as a highlighter I highlight my tear duct, which is the skin right by the inside of your eye by your nose, my cupids bow, which is the area just above your lips, and then in the standard places, like my nose, my t-zone, the tops of my cheeks, and just under and above my eye brow.

8) Illuminator

This is very easy to do, mix the colour Pigment you would like to illuminate your skin, such as a simple highlighter colour such as pure white or Vanilla, or a colour you would like a tint of in the skin, such as any golds or pinks, in with your foundation when you go to put it on. When mixed well this will illuminate your skin nicely and give a nice highlight and hint of the pigment colour you mixed. Buying illuminators in shops can be quite expensive so this is a great use of the MAC Pigment.

9) Nail Varnish

This seems a little crazy, but yes, you can actually use MAC Pigment to create your own custom nail varnish colour, You simply mix in your pigment(s) in with a clear nail varnish, or a coloured nail varnish if you want to see what interesting outcomes you can make with different pigments and nail varnish colours, and then apply to the nail with your nail varnish brush, the colours, like when mixing the colours in the above options, really pop and are really vibrant.

10) Lipstick / Gloss

A lot of lipsticks that are long lasting or have really vibrant and pigmented colours tend to really dry out your lips, However, if you use MAC Pigment as a lipstick you can get a really vibrant pop of colour lipstick that is really soft on the lips, all you do, is mix in your pigment with a clear lipgloss or a lipbalm (if you want really soft lips), and apply to your lip with a lipstick brush or your finger. It create a really beautiful and bright lipstick, with a matte, sparkle or sheen effect depending on your choice of colour and finish!

11) Eye Brows

Here all you do, is choose a pigment colours that is 1-2 shades lighter than your natural hair coulour and apply directly to the eyebrows to fill them in, using an angled brush is best as these are easiest to use when filling in your brows, these angled brushes are what you will find most of the time in brow kits! Here you could mix your pigment for you brows in with a tiny bit of water oR Fix & Spray if you prefer to use a creamier type substance when filling in your brows to make them stay and wax them down, but it is completely up to you!

12) Body Shimmer

There are two ways to use this as a body shimmer, of which, I have tried and it works really well as! The easy way is to get a really big puffy powder brush, dab it ever so slightly into your chosen powder and sweep over the areas of your body that would naturally hit the light, such as your collar bone and shoulders. Depending on the look you want you could use golds, pinks or the selection of white based colours.

Another way, for a more subtle finish, is by mixing your Pigment into your Body lotion (Preferably not body butters or cream as they are difficult to blend), and then massaging your Body lotion and Pigment mix into the skin. This created for the perfect body shimmer that is really subtle and gives a lovely glow.

13) Body Contouring

Like above, if you want to contour areas of your body, use darker MAC Pigments in colours like gold and silver, and mix them in with your body lotion. Once you have done this, simply apply to the areas you want to contour (areas that are naturally shadowed) such as on the knees and up the sides of your legs, on your chest in your cleavage area, and under your collar bones, and it will make you look beautifully toned. You could apply this with a large flat foundation brush, your hands or in fact any brush you like that has quite a large surface area and is quite generally BIG, as you are applying to a much larger area unlike your face. You will get better coverage with a larger brush.

14) Hair

If you want a hint of pigment in your hair, whether it be for colour, sparkle, or highlight, all you have to do, is mix in your Pigment with the product you are using for your hair, whether it be Gel, Moose, Cream, Heat Protection cream or any other product, and then apply the product mix through your hair and then go about your normal hair routine like usual. And then voila! Depending on the product you are using and whether your product is used when you have damp or dry hair you will achieve different effects, and of course it depends on how much pigment you used! 

15) Custom Colours

One of the greatest things about pigments is that fact that you can mix 2 colours or even 3 or more and create your own personal colours! For example you could mix blue and green to create a lovely turquoise colour. You can mix your personal colours and then use them in any of the ways above!

So, I really hope that you, like me, can now make the most of your MAC Pigment!
Have a lovely day!
xoxo

Tuesday, 27 May 2014

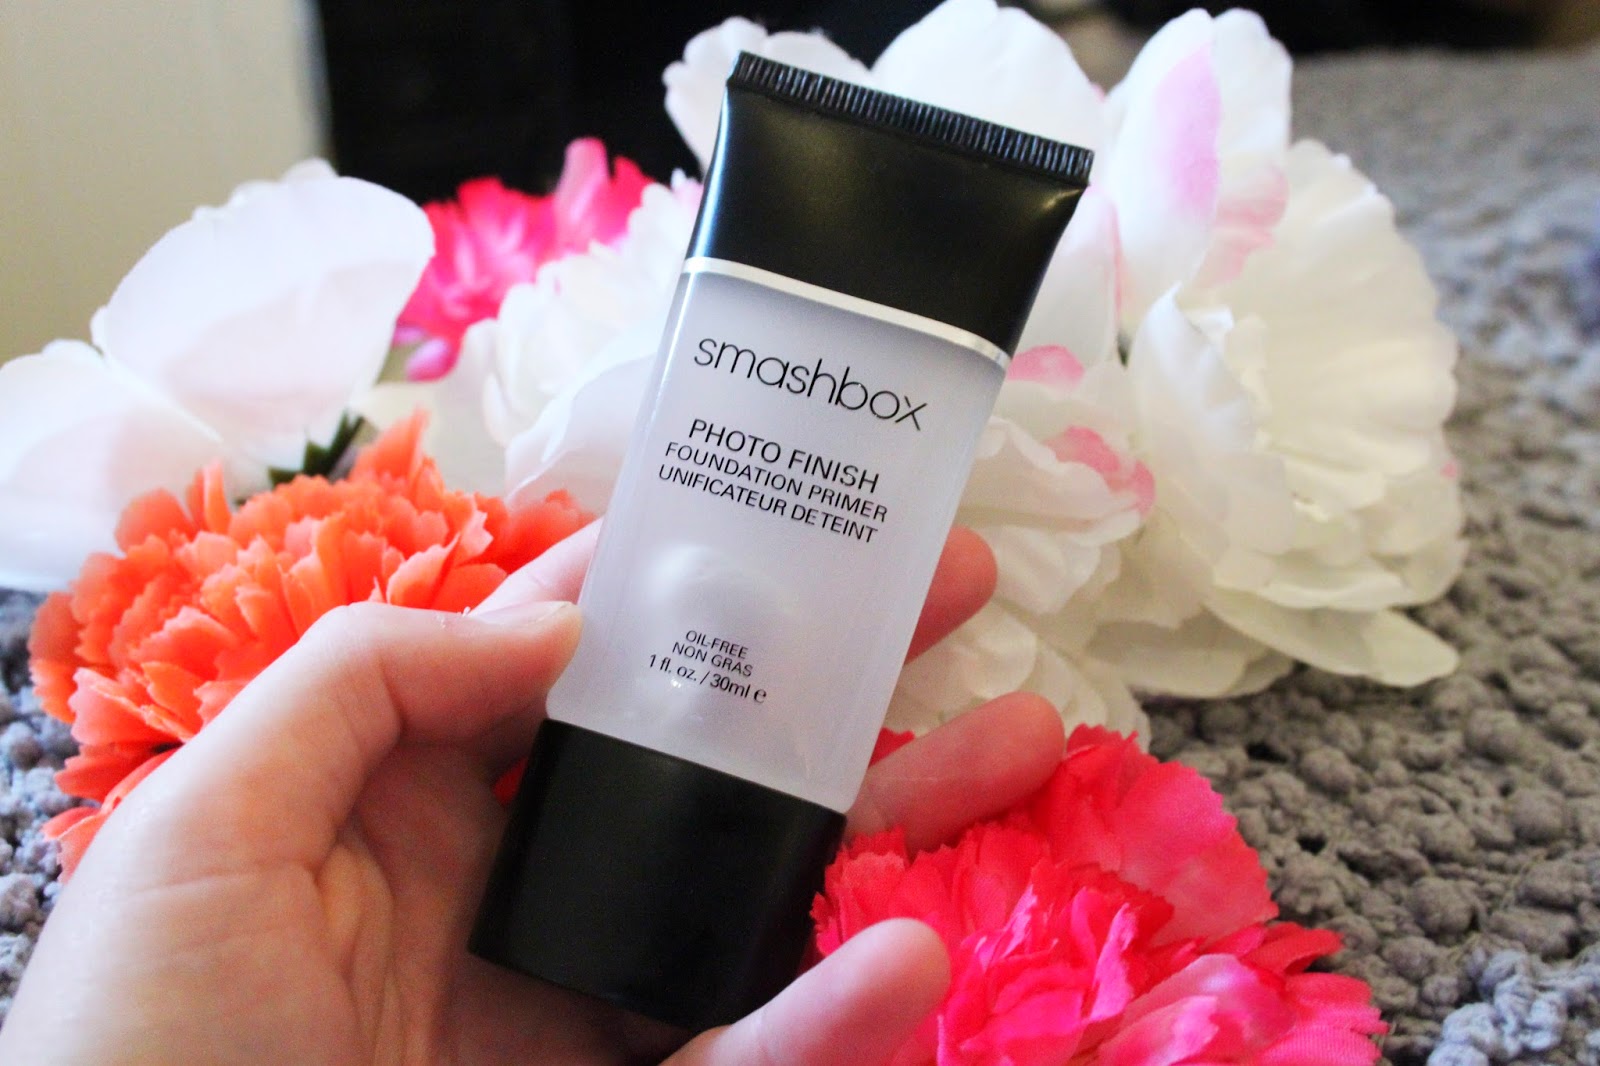
Smashbox Photo Finish Foundation Primer


Hello Everyone! 
This, I am happy to say, is my first product review on my blog, and the product I am going to be reviewing is this Smashbox Photo Finish Foundation Primer. I have had this product for a while now, probably about 4 Months and it is the primer that I use every. single. day. And by this you can probably tell that this is a good review! I bought this product in Boots at The Mall in Cribbs Causeway in Bristol. I had known about this product for quite a long time, as I had seen quite a few Beauty Gurus talk about it, however, I was under the impression that Smashbox was only online and only in America, however, a new stool had just opened in Boots in Bristol and I was so happy I couldn't wait to get my hands on it! So this is why I am super excited to tell you about this Primer sent from heaven.

Price
Firstly, I might as well get out the way the only thing that might be seen as a negative with this primer... the Price! I purchased this primer for £25. The second most expensive primer I have ever purchased; second to the Mac Prep & Prime Brightening Serum for £30. £25 However is still a fairly expensive product for 30ml/1fl. oz. of product. Needless to say - although this is quite a big price tag for an average amount of product, it really becomes irrelevant, and that brings me onto the second thing to talk about...

Coverage
The price of this product for the amount is definitely worth it when you use this product and see how a little amount goes a long way. I'm not sure if this may be different if you apply your primer with your hands, However, I apply my primer with the same brush I apply my foundation with, the 187 Duo Fibre brush from Mac and this primer goes a really long way when I apply it with this brush; I literally have to use an amount smaller than a pea spread evenly over my brush hairs and this covers my entire face and little bit of my neck if i need it: Meaning that although there is a small amount in there, you will be using a lot less and it will last a very long time!

As well as this, I found that when applying this makeup this primer then improved the coverage of my concealer and foundation. I would let the primer dry for a very short amount of time, maybe just less than a minute, and then apply my concealer, and it allows the concealer on my brush to spread a lot more around where i am applying before having to put more concealer on my brush; I have to put my concealer in my brush a lot less! The primer makes the face very smooth and bases the face with the perfect amount of softness for the concealer to glide nicely over the face. I use the Studio finish SPF 35 concealer by Mac on a normal day and when it is quite cold, the concealer tends to go very hard, even though it is already a compacts concealer rather than a liquid concealer, when this happens it doesn't apply evenly onto my concealer brush and I am using a lot more product and constantly going back to my concealer to apply more, However, the Smashbox primer, reduces this by a huge amount and almost restores the concealer back to being a lot softer and spreading more over the face. This also applies to my foundation, it really helped the brush glide over my face.


Feel
My ultimate favourite thing about this product is how unbelievably soft it is - When I first applied this product with my brush, I truly thought that it wasn't being applied to my face and I was left confused thinking... Why does this keep disappearing!?? However, then I looked and applied a small amount with my hands, and realised it was going on, but the product was so smooth and feathery that I could feel it! It literally felt like applying feathery air to my face! It was very light and weightless on the face and felt just perfect. I then felt my face with my hand and my face felt softer than a babies bum, I have never felt my skin so smooth before.

Look
When i first applied the primer, I looked at my face before even applying foundation, and even though the Primer is a clear product, my skin actually looked slightly airbrushed in my opinion, the red areas on my skin and any variation in colour of the skin on my famous almost looked as if it had blended in and evened out slightly on my face. The product also really worked for me with shine control, I have a very shiny nose, chin and T-zone and the product seemed to give a mattified effect to my skin, where the shine was very much reduced - which is a big bonus for my because I am always whining about my shine nose!

Then I applied my foundation and was I amazed! The primer allowed my foundation on my brush to just glide over my face, and the foundation was completely consistent over my face... no gaps on bits I may have only brushed over slightly or gaps on particularly dry areas, and no inconsistency of the coverage of my foundation: And because of this, my skin looked airbrushed, the foundation was even all over the face, even when I looked closely through my magnified mirror, almost as if my foundation was my actual natural skin! Usually I would have applied two layers of my foundation, However, in this case, I only needed to apply one. I did definitely feel photo ready and felt like my underlying not perfect skin was flawless.

You
I do really recommend that you try this product, However, as mentioned above it is quite pricey, in Boots i know that they do have a travel sized one available for £12.50, which has 12ml / 0.4fl. oz.
which is a lot more affordable and great if you just want to give it try. As well as this, there is a box available by Smashbox, called the Try It Kit which is tester sizes of all of there top selling products, I purchased this when I bought this primer, also from Boots, for £19. It comes with 7.1ml / 0.25fl. oz. of the Smashbox Primer, and it also comes with a tester sized Photo Finish Lid Primer, Full Exposure Mascara, Limitless Eye Liner in Onyx, Lip Enhancing Gloss in Illume. (Amounts below)

  • Photo Finish Foundation Primer - 0.25 fl. oz. / 7.1ml
  • Photo Finish Lid Primer - 0.02 fl. oz. / 0.5ml
  • Full Exposure Mascara - 0.13 fl. oz. / 4.0ml
  • Limitless Eyeliner in Onyx - 0.03 oz. / 0.8g
  • Lip Enhancing Gloss in Illume - 0.14 fl. oz. / 4.2ml
This is a really great kit if you're interested in just trying out Smashbox as a band, and want to explore there various products and see how you are with them, without having to spend lots of money on all of the full sized versions of their products!

I hope you enjoyed this review, if there's anything I missed out that you want to know about the primer, just ask. Have a lovely Tuesday! xo


Design by | SweetElectric