Pages

Friday, 20 June 2014

Mac Pigment | 15 Ways To Use

Hello Lovely People!
So it wasn't until recently that I purchased and used MAC Pigment for the first time, (I know, crazy), And when I purchased Mac Pigment I was under the impression that it was simply an eyeshadow, but I couldn't have been more wrong! I discovered that there are in fact 15 ways to use it after a little but of experimenting and searching the Internet.

Mac Pigment is very simply, a coloured loose powder. Which most people use as an eyeshadow, However, many of you may not know the many other uses it has, which is almost anything by the way! That's why I wanted to do this blog post to tell you about the many other uses for Pigment so that you can make the most of yours!


1) Eye Shadow

Firstly, Is the very simple way which most people use MAC Pigment for, which is just using the loose powder, as is, as an eyeshadow. It comes in a very wide selection of colours, and finishes, including matte, frost metal and pearl, of which are matte, sparkle and sheen finishes meaning it is perfect for using as an eyeshadow and making some very beautiful eye looks. To use in this way you would simply dab your choice of brush into your chosen pigment, shake to remove any excess unneeded amount of Pigment, as you don't need very much, and then apply to the eye, Depending on what brush you choose to use you could apply the Pigment in a very feathered way or very concentrated way.

2) Applied Wet For Metallic Eye Shadow

Another way to use Pigment is, again, as an eyeshadow, but more as a cream based eyeshadow, similar to the Mac Paint Pot. To do this, I would mix in some of the pigment with simple water or if you have it available, Mac Fix & Spray. Then, simply grab your desired brush and apply to the eye. You will notice that the colour from the Pigment with really pop and stand out and in fact some finer colours that you may not quite see when in powder form, really come out when you apply in creamy form.

3) Blush

Using Pigment as blush is another great way you can use this product, Here you would use the product, as is, like in one, but using your desired blush or large puffy powder brush, and apply to the cheeks, depending on your preference, you could use any colour from the options, you never know, you could be quite wild and daring and want blue blusher! But Peachy, Pinks, Oranges, Reds, Corals, and Possibly Purple colours are the best options to create a realistic looking blush. As mentioned before, you could go for a very matt blush or could go for a satin finish blush with a slight sheen, depending on the finish you choose from the colour options. Depending on how strong you want you blush to be, you only need to use a tiny amount of the Pigment here, it is very highly concentrated and a little bit goes a really long way!

4) Bronzer
Very much like above, use the pigment, as is, in the darker colours that resemble bronzer colours, such as Tan and Naked Deep Dark, and apply to the areas you want to be bronzed!

5) Eye liner

Again, the same as you would do with step 1) Mix the pigment with water or Mac Fix & Spray. Once you have mixed you would use a thin eyeliner brush and simply apply whatever colour you wish as an eyeliner. You could use a black and go for a typical eyeliner or you could use golds and bright neon colours for some really great editorial look thats really stand out!

6) Coloured Mascara

There are two ways you can do this, I discovered online, you can dip an empty disposable Mascara Wand into your Mix of Pigment and Water or Mac Fix & Spray and apply to the lashes as normal, or you can simply use a clear Mascara, dip into the powder of your choice and apply to the lashes.

7) Highlighter

One of my favourite ways to use pigment is as a highlighter, You could do this in two different ways. The first way is very simple, you would simply use a brush or your finger and apply the Pigment, as is, to the desired area you want to highlight, light colours are recommended of course and you are trying to brighten these areas, However, there are many different choices, the most popular, and the colour that I purchased, is in colour Vanilla, although there are many other white, cream and in fact gold colours for the perfect highlight. Another way is like in many of the steps above, mix your pigment in with water or Fix & Spray by MAC or possible with any face creams you have, or possible with a cream based highlighter you are already using if you wish, and apply to the face as a cream based highlighter. When I used pigments as a highlighter I highlight my tear duct, which is the skin right by the inside of your eye by your nose, my cupids bow, which is the area just above your lips, and then in the standard places, like my nose, my t-zone, the tops of my cheeks, and just under and above my eye brow.

8) Illuminator

This is very easy to do, mix the colour Pigment you would like to illuminate your skin, such as a simple highlighter colour such as pure white or Vanilla, or a colour you would like a tint of in the skin, such as any golds or pinks, in with your foundation when you go to put it on. When mixed well this will illuminate your skin nicely and give a nice highlight and hint of the pigment colour you mixed. Buying illuminators in shops can be quite expensive so this is a great use of the MAC Pigment.

9) Nail Varnish

This seems a little crazy, but yes, you can actually use MAC Pigment to create your own custom nail varnish colour, You simply mix in your pigment(s) in with a clear nail varnish, or a coloured nail varnish if you want to see what interesting outcomes you can make with different pigments and nail varnish colours, and then apply to the nail with your nail varnish brush, the colours, like when mixing the colours in the above options, really pop and are really vibrant.

10) Lipstick / Gloss

A lot of lipsticks that are long lasting or have really vibrant and pigmented colours tend to really dry out your lips, However, if you use MAC Pigment as a lipstick you can get a really vibrant pop of colour lipstick that is really soft on the lips, all you do, is mix in your pigment with a clear lipgloss or a lipbalm (if you want really soft lips), and apply to your lip with a lipstick brush or your finger. It create a really beautiful and bright lipstick, with a matte, sparkle or sheen effect depending on your choice of colour and finish!

11) Eye Brows

Here all you do, is choose a pigment colours that is 1-2 shades lighter than your natural hair coulour and apply directly to the eyebrows to fill them in, using an angled brush is best as these are easiest to use when filling in your brows, these angled brushes are what you will find most of the time in brow kits! Here you could mix your pigment for you brows in with a tiny bit of water oR Fix & Spray if you prefer to use a creamier type substance when filling in your brows to make them stay and wax them down, but it is completely up to you!

12) Body Shimmer

There are two ways to use this as a body shimmer, of which, I have tried and it works really well as! The easy way is to get a really big puffy powder brush, dab it ever so slightly into your chosen powder and sweep over the areas of your body that would naturally hit the light, such as your collar bone and shoulders. Depending on the look you want you could use golds, pinks or the selection of white based colours.

Another way, for a more subtle finish, is by mixing your Pigment into your Body lotion (Preferably not body butters or cream as they are difficult to blend), and then massaging your Body lotion and Pigment mix into the skin. This created for the perfect body shimmer that is really subtle and gives a lovely glow.

13) Body Contouring

Like above, if you want to contour areas of your body, use darker MAC Pigments in colours like gold and silver, and mix them in with your body lotion. Once you have done this, simply apply to the areas you want to contour (areas that are naturally shadowed) such as on the knees and up the sides of your legs, on your chest in your cleavage area, and under your collar bones, and it will make you look beautifully toned. You could apply this with a large flat foundation brush, your hands or in fact any brush you like that has quite a large surface area and is quite generally BIG, as you are applying to a much larger area unlike your face. You will get better coverage with a larger brush.

14) Hair

If you want a hint of pigment in your hair, whether it be for colour, sparkle, or highlight, all you have to do, is mix in your Pigment with the product you are using for your hair, whether it be Gel, Moose, Cream, Heat Protection cream or any other product, and then apply the product mix through your hair and then go about your normal hair routine like usual. And then voila! Depending on the product you are using and whether your product is used when you have damp or dry hair you will achieve different effects, and of course it depends on how much pigment you used! 

15) Custom Colours

One of the greatest things about pigments is that fact that you can mix 2 colours or even 3 or more and create your own personal colours! For example you could mix blue and green to create a lovely turquoise colour. You can mix your personal colours and then use them in any of the ways above!

So, I really hope that you, like me, can now make the most of your MAC Pigment!
Have a lovely day!
xoxo

Monday, 9 June 2014

A Walk In The Park | OOTD

Today I went for a drive in my new car, and ended up at the woods, me and my boyfriend decided to go for a walk, so I thought I'd get him to snap a picture of my outfit for the day! I know I seem a little too dressed up for the woods and I have slightly inappropriate footwear for the muddy walkways but I was too excited to wear some of my latest purchases!


Floral Statement Necklace | Wallis @ Debenhams | £20.00
Blue Denim Skinny Jeans (Old) | Topshop | £40
White Sandles | Primark | £8.00

I bought some of these pieces recently, the crop jumper I particularly love, and bought to wear on the plane on my upcoming holiday. This crop top is part of a co-ord set and you can buy a midi knitted skirt to match, but I didn't need the other half on this occasion (unlike me!) My pink round sunglasses are also from missguided and they are my absolute fave, they are the prettiest colour of pink and have a really nice graduated lens that fades from black to clear. This beautiful floral statement necklace is from the Wallis section in Debenhams, the moment I saw it I fell in love, it's made up of lots of really pretty pastel colours and gems and makes any boring outfit look beautiful! The jeans from Topshop were bought quite a while back, I wear them often because they are just so soft, and the super tight fit clings perfectly onto my legs! Finally, my gorgeous new Primark sandals, these seem to be quite a popular little purchase amongst bloggers, they are just as stylish as any purchase similar from somewhere such as River Island or Topshop and are quite well made, and the best part.. only £8!! Quite a difference from the £40 they cost in some other shops!

Hope you loved my casual walk in the woods outfit as much as I love it and my new Missguided, Primark and Wallis purchases.

Lots of love xo

Wednesday, 28 May 2014

Floral, Pastels & PVC | Outfit

Today I was looking through the Miss Selfridge Website, and came across a top that I completely and utterly fell in love with, I sat there thinking of things that I could pair this item with, so I thought what more perfect timing than this to put together an outfit with some items I think look lovely together!


90s Floral Crop | Miss Selfridge | £12
Nagsia PVC Mini Skirt | Missguided | £17.99
Light Purple T-Bar Platform Sandals | River Island | £55
Megan Painted Clutch Bag | Missguided | £14.99
Aldo Frirella Tough Pretty Necklace | ASOS | £25

The item I fell in Love with on Miss Selfridge was, of course, the beautiful 90s Floral Crop; definitely my new favourite style of crop top... and the colour in the flowers on this was are absolutely beautiful, I love the different mixes of purple and blue! The great thing was, as well, is that the top would pair nicely with any of the many shades of purple and blue in the top. 

I felt that because the top is quite loud, it would pair with items nicely that are the opposite, little or no pattern, plain and simple! The first thing I paired the top with was the PVC Blue Skirt from Missguided, which I really adore, I thought, as I am going for something very simple, I didn't want the look to be completely boring with the plain items I was going to be using, so I thought I would keep the outfit nice and interesting with quite a daring fabric, PVC is really starting to come in and become much more popular, and I think pastel with PVC makes for a really nice combination. I thought I would use baby blue so that I could bring out more of the blue from the top, as the majority of the shades are purple. I carried on the PVC look with a Lilac clutch from Missguided, again very simple but matching the fabric with the skirt and matching with some of the purple in the top. I then added a pair of killer heels, adding some diversity to the look with a matte texture, the complete opposite of the very shiny pvc, the heels are another different shade of purple. Finally, I added a statement necklace, keeping with the floral theme and adding something else to go with the top that quite literally, makes a statement!

Overall I love this look, very feminine and it is really suited for Spring / Summer this year, and would be great as a night outfit, or a day outfit paired with some nice flats! 

I hope your loving this look as much as I am!
Hopefully I will get to wear it and write a post showing me wearing this perfect outfit!
I wish!
Goodnight & Sweet Dreams xo

ASOS | Mix Up Look Sharp | Swimwear

Today I was I was scrolling through Instagram and I cam across a post by @Asos_Swim about their new Mix-Up Look Sharp feature for their swimwear on their ASOS website; A feature where you can slide through the optional bikini tops and bottoms and mix and match for your ideal bikini combo! I thought this was just perfect for what I've been looking for. In June I am flying off to Fuerteventura (Thank God, A well overdue holiday!) and I was looking for a very simple white bikini, very plain and bandeau that will keep my tan lines to a minimal! I went onto the website and took a look and found it a really great feature for getting some nice, simple, mix and match bikini sets. 

The feature is really easy to use, with the photograph of the bikini top directly above the photograph of the bikini bottoms. and a left and ride arrow click scroll option to flip through the different bikini options. Next to the bikini top and bottom is the colour options for the various top and bottom halves of the various bikinis. The bikinis sets are very simple, However, there is a good variety of the main styles of bikini, such as bandeau, straps, cupped, triangle and a few others. Each bikini has a nice variation of different colour options and patterns, such as pink, green, white and a few others and plain, polka dot and stripes! - Stripes of which, I am obsessed with!

The Mix up Look Sharp feature is really great if you want a couple of different bikini looks without having to necessarily have to buy to whole bikini sets! You could be one top and two different bottoms and voila! - You have two looks! Have a look and a play around with all the different possibilities there are and make some beautiful bikini looks suited to you!
Here are some of my bikini looks that I loved!


Pink Polka Dot Cupped Top With Plain Pink Bottoms


Deep Coral Striped Cupped Top With High Wasited White Bottoms


Green Triangle Front Clip Top With Thick Banded Green And White Striped Bottoms


White Twisted Bandeau Top With White Tie Side Bottoms


Black And White Striped Cupped Top With Black High Waited Bottoms


White Cupped Top With Thick Banded Green And White Striped Bottoms


As you can see I really, really loved the cupped style! Which one will you love the most?
Have a look at the ASOS Mix Up Look Sharp Feature and mix your perfect match!

Have a lovely Wednesday! xo

Tuesday, 27 May 2014

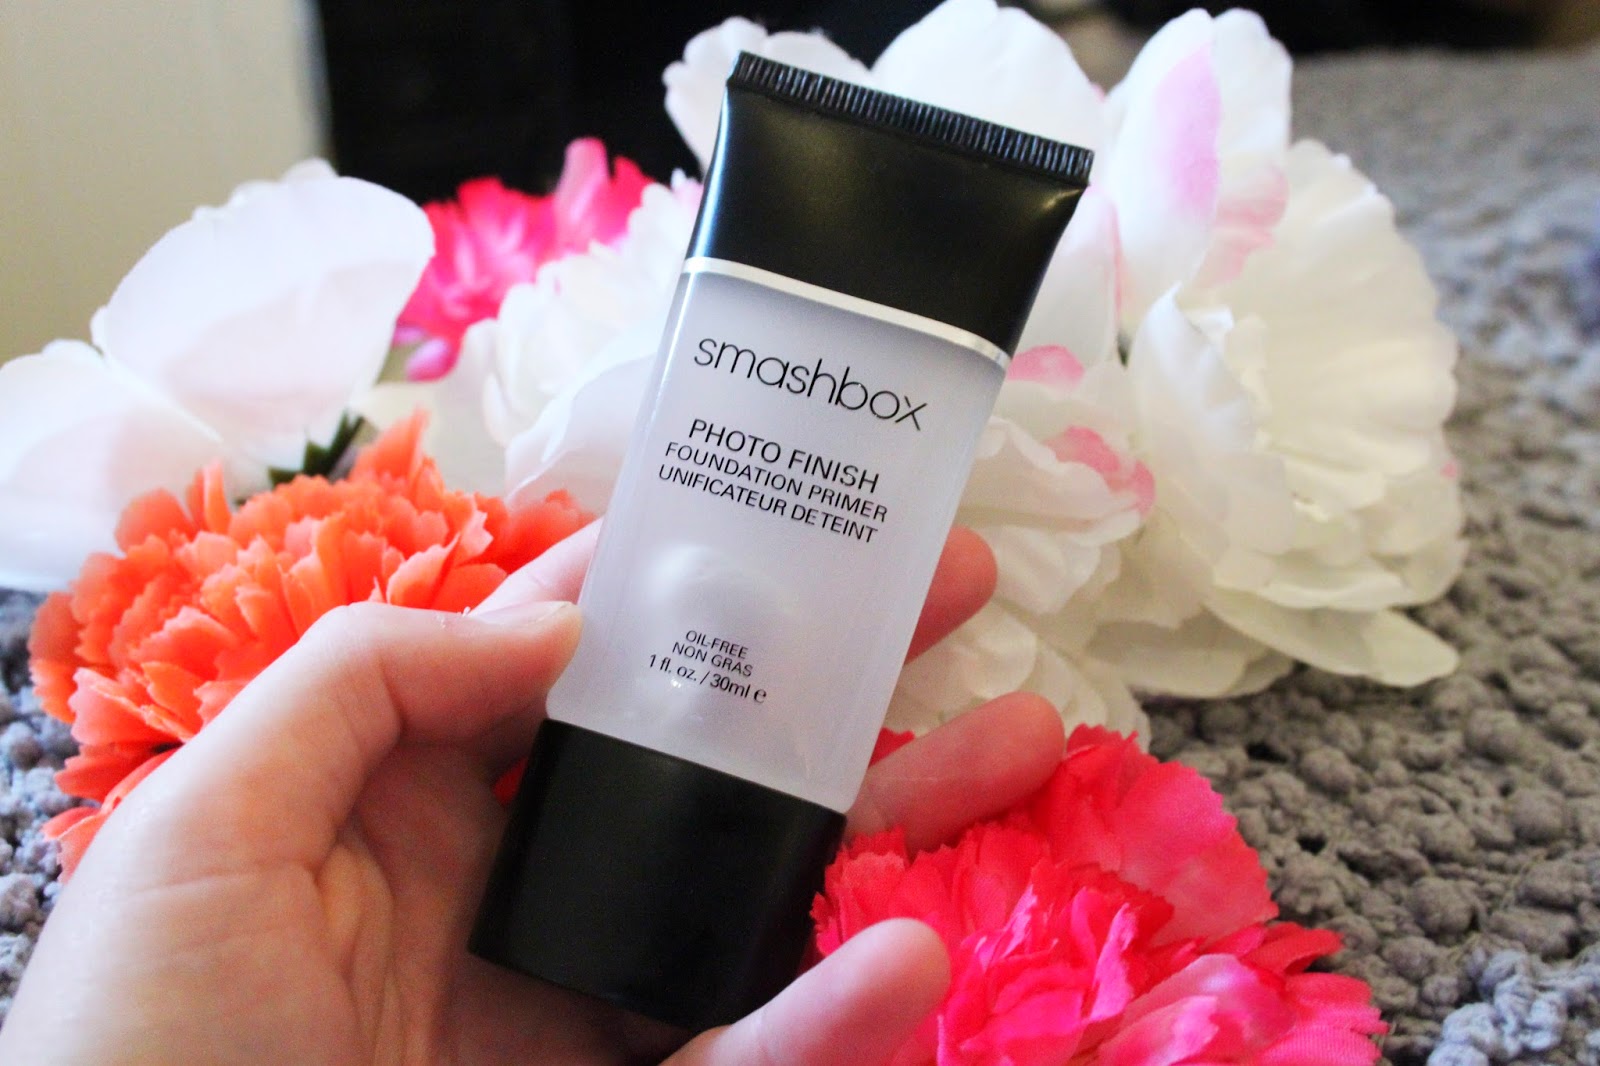
Smashbox Photo Finish Foundation Primer


Hello Everyone! 
This, I am happy to say, is my first product review on my blog, and the product I am going to be reviewing is this Smashbox Photo Finish Foundation Primer. I have had this product for a while now, probably about 4 Months and it is the primer that I use every. single. day. And by this you can probably tell that this is a good review! I bought this product in Boots at The Mall in Cribbs Causeway in Bristol. I had known about this product for quite a long time, as I had seen quite a few Beauty Gurus talk about it, however, I was under the impression that Smashbox was only online and only in America, however, a new stool had just opened in Boots in Bristol and I was so happy I couldn't wait to get my hands on it! So this is why I am super excited to tell you about this Primer sent from heaven.

Price
Firstly, I might as well get out the way the only thing that might be seen as a negative with this primer... the Price! I purchased this primer for £25. The second most expensive primer I have ever purchased; second to the Mac Prep & Prime Brightening Serum for £30. £25 However is still a fairly expensive product for 30ml/1fl. oz. of product. Needless to say - although this is quite a big price tag for an average amount of product, it really becomes irrelevant, and that brings me onto the second thing to talk about...

Coverage
The price of this product for the amount is definitely worth it when you use this product and see how a little amount goes a long way. I'm not sure if this may be different if you apply your primer with your hands, However, I apply my primer with the same brush I apply my foundation with, the 187 Duo Fibre brush from Mac and this primer goes a really long way when I apply it with this brush; I literally have to use an amount smaller than a pea spread evenly over my brush hairs and this covers my entire face and little bit of my neck if i need it: Meaning that although there is a small amount in there, you will be using a lot less and it will last a very long time!

As well as this, I found that when applying this makeup this primer then improved the coverage of my concealer and foundation. I would let the primer dry for a very short amount of time, maybe just less than a minute, and then apply my concealer, and it allows the concealer on my brush to spread a lot more around where i am applying before having to put more concealer on my brush; I have to put my concealer in my brush a lot less! The primer makes the face very smooth and bases the face with the perfect amount of softness for the concealer to glide nicely over the face. I use the Studio finish SPF 35 concealer by Mac on a normal day and when it is quite cold, the concealer tends to go very hard, even though it is already a compacts concealer rather than a liquid concealer, when this happens it doesn't apply evenly onto my concealer brush and I am using a lot more product and constantly going back to my concealer to apply more, However, the Smashbox primer, reduces this by a huge amount and almost restores the concealer back to being a lot softer and spreading more over the face. This also applies to my foundation, it really helped the brush glide over my face.


Feel
My ultimate favourite thing about this product is how unbelievably soft it is - When I first applied this product with my brush, I truly thought that it wasn't being applied to my face and I was left confused thinking... Why does this keep disappearing!?? However, then I looked and applied a small amount with my hands, and realised it was going on, but the product was so smooth and feathery that I could feel it! It literally felt like applying feathery air to my face! It was very light and weightless on the face and felt just perfect. I then felt my face with my hand and my face felt softer than a babies bum, I have never felt my skin so smooth before.

Look
When i first applied the primer, I looked at my face before even applying foundation, and even though the Primer is a clear product, my skin actually looked slightly airbrushed in my opinion, the red areas on my skin and any variation in colour of the skin on my famous almost looked as if it had blended in and evened out slightly on my face. The product also really worked for me with shine control, I have a very shiny nose, chin and T-zone and the product seemed to give a mattified effect to my skin, where the shine was very much reduced - which is a big bonus for my because I am always whining about my shine nose!

Then I applied my foundation and was I amazed! The primer allowed my foundation on my brush to just glide over my face, and the foundation was completely consistent over my face... no gaps on bits I may have only brushed over slightly or gaps on particularly dry areas, and no inconsistency of the coverage of my foundation: And because of this, my skin looked airbrushed, the foundation was even all over the face, even when I looked closely through my magnified mirror, almost as if my foundation was my actual natural skin! Usually I would have applied two layers of my foundation, However, in this case, I only needed to apply one. I did definitely feel photo ready and felt like my underlying not perfect skin was flawless.

You
I do really recommend that you try this product, However, as mentioned above it is quite pricey, in Boots i know that they do have a travel sized one available for £12.50, which has 12ml / 0.4fl. oz.
which is a lot more affordable and great if you just want to give it try. As well as this, there is a box available by Smashbox, called the Try It Kit which is tester sizes of all of there top selling products, I purchased this when I bought this primer, also from Boots, for £19. It comes with 7.1ml / 0.25fl. oz. of the Smashbox Primer, and it also comes with a tester sized Photo Finish Lid Primer, Full Exposure Mascara, Limitless Eye Liner in Onyx, Lip Enhancing Gloss in Illume. (Amounts below)

  • Photo Finish Foundation Primer - 0.25 fl. oz. / 7.1ml
  • Photo Finish Lid Primer - 0.02 fl. oz. / 0.5ml
  • Full Exposure Mascara - 0.13 fl. oz. / 4.0ml
  • Limitless Eyeliner in Onyx - 0.03 oz. / 0.8g
  • Lip Enhancing Gloss in Illume - 0.14 fl. oz. / 4.2ml
This is a really great kit if you're interested in just trying out Smashbox as a band, and want to explore there various products and see how you are with them, without having to spend lots of money on all of the full sized versions of their products!

I hope you enjoyed this review, if there's anything I missed out that you want to know about the primer, just ask. Have a lovely Tuesday! xo


Friday, 23 May 2014

Shady Lust List - 5 Fave Summer Shades

I don't know about you guys, but this Summer I am obsessed with Sunnies, every time I step out to goto the shops I find myself picking up a pair, whether I'm picking up some from Primark for £2; because they're so cheap I just have to, or whether I splashed out £40 for a pair from House of Frasier.(Well, I don't know about you, but I think £40 is a lot for a pair of Shades!)
I usually have to actually goto the shops to buy a pair, rather than buy online, because most Sunglasses are way to big for my tiny head! - However, here are 5 Shades that I've found online and am lusting after this Summer!


1. PepperMayo is another site I came across recently, It's another Australian website that stocks lots of the brands I love, a long with this, they are another place that sells really nice Sunnies. These bug-eye glasses (as I call them) are a favourite style of mine; these glasses particular are very simple, very black and white, however, the frame seems to have a slight pale pink tinge to it, which is what I really loved about them; this summer I am really loving the very pale pastels and this pale pink colour is very girly and tends to suit me and go well with my usually pale skin! They would go really nicely with an oversized black hat and a pastel coloured outfit.

2.  These Sunglasses are definitely my favourite out of the lot - Floral sunglasses are really in this Summer, Sunglasses with these small 3d flowers on are absolutely everywhere; goto any shop and I'm quite sure you'll find a pair! I first seen these Sunglasses from Nasty Gal on a photograph off of Instagram... A photograph of Kendall Jenner, at the Coachella Festival, wearing Sunglasses that either are these exact shades or look very much alike, identical in fact.

I looked around to find out If they were the very same, but didn't manage to. Either way, The moment that I seen this Photo, I fell in love. I love how the pastel blue roses run all the way across the top and down the sides, And how the flower is consistent throughout the shades but they have a range of different sizes to mix it up.


3. Well, Well, Well... What can I say about Quay? Quay is a brand I discovered recently while browsing through the Nasty Gal shop (Which is do, a lot!) A lot of the sunglasses that Nasty Gal stock are by Quay; there shades are very clean cut, by which I mean, nice smooth edges, pretty black and white, figuratively speaking, and not too fussy and complicated; I think they have quite a futuristic feel to a lot of them. Regardless, I am really loving them. However, these Quay sunglasses in particular? Firstly I was drawn into them because they were a nice pair of sunnies, of which I know the style fits my face shape, but then alongside that they were reduced from £23.70 to £9.48! I thought this was good, and then when I find out that currently, all sale items are 50% off at checkout!?!?! I thought Bargain and my eye zoomed on in; £4.24 for a pair of these Sunglasses, in fact I think that's a pretty good deal for any sunglasses at all! They'll be going fast though, Grab them quick!

4. Usually, I tend not to go near Net-A-Porter, because I know I'll just get upset knowing that I can look but I cannot have, with some of the designer stuff they stock hitting thousands. However, today I thought i'd have a little look; and I came across these Sunnies. £40, still on the upper end of what I like to pay, However, I really adore these ones, I'm a complete sucker for things that look like confetti, and I thought the gold Polka-Dot confetti with the clear frame with gold tint when nicely together. Will possibly be purchasing when I feel like reaching into my pocket!

5. Last but not least, This Kitty shades are definitely up there with the Kendall Sunnies; Again from Nasty Gal :'), Sorry! Cat Eye Shades are another style that is really in this summer, although I feel that for my small head, and in fact for even normal sized heads ;) Some of them are a bit too much, the point darting off way up and beyond your face! These, However, i thought had a nice amount of Cat-like flick and size and along with that, the beautiful Matte black frame is an extra added bonus!

These are the shades I'm really loving, so what style of shades are your favourite?
Thanks for a reading and have a lovely evening! xo

My First Post!

Hey Lovely People, I'm Kayley! :)


Today I am writing my first ever blog post for Blouse and Brows! - A Fashion and Beauty blog which is a space dedicated to sharing the products I am loving and think you should be loving too! 
Have a lovely day. 

Here goes...

Design by | SweetElectric